
Relive the Past: A Simple Guide to Digitizing Your VHS Tapes
Remember those cherished family moments captured on VHS tapes? The awkward school plays, the unforgettable birthday parties, or maybe, like me, the potentially mortifying bar mitzvah videos from the 90s. While the thought of actually watching them might induce a cringe, those tapes hold irreplaceable memories, and preserving them is a worthwhile endeavor.
VHS tapes, unfortunately, aren’t known for their longevity. Over time, they degrade, and those precious memories risk fading away forever. Digitizing them is the best way to ensure they’re safe for future generations.
The good news is that you don’t need to be a tech wizard or spend a fortune to digitize your old VHS tapes. With a few affordable tools and a bit of patience, you can convert those analog memories into digital files that can be easily stored, shared, and enjoyed for years to come.
The Hardware You’ll Need
Here’s what you’ll need to embark on your VHS digitization journey:
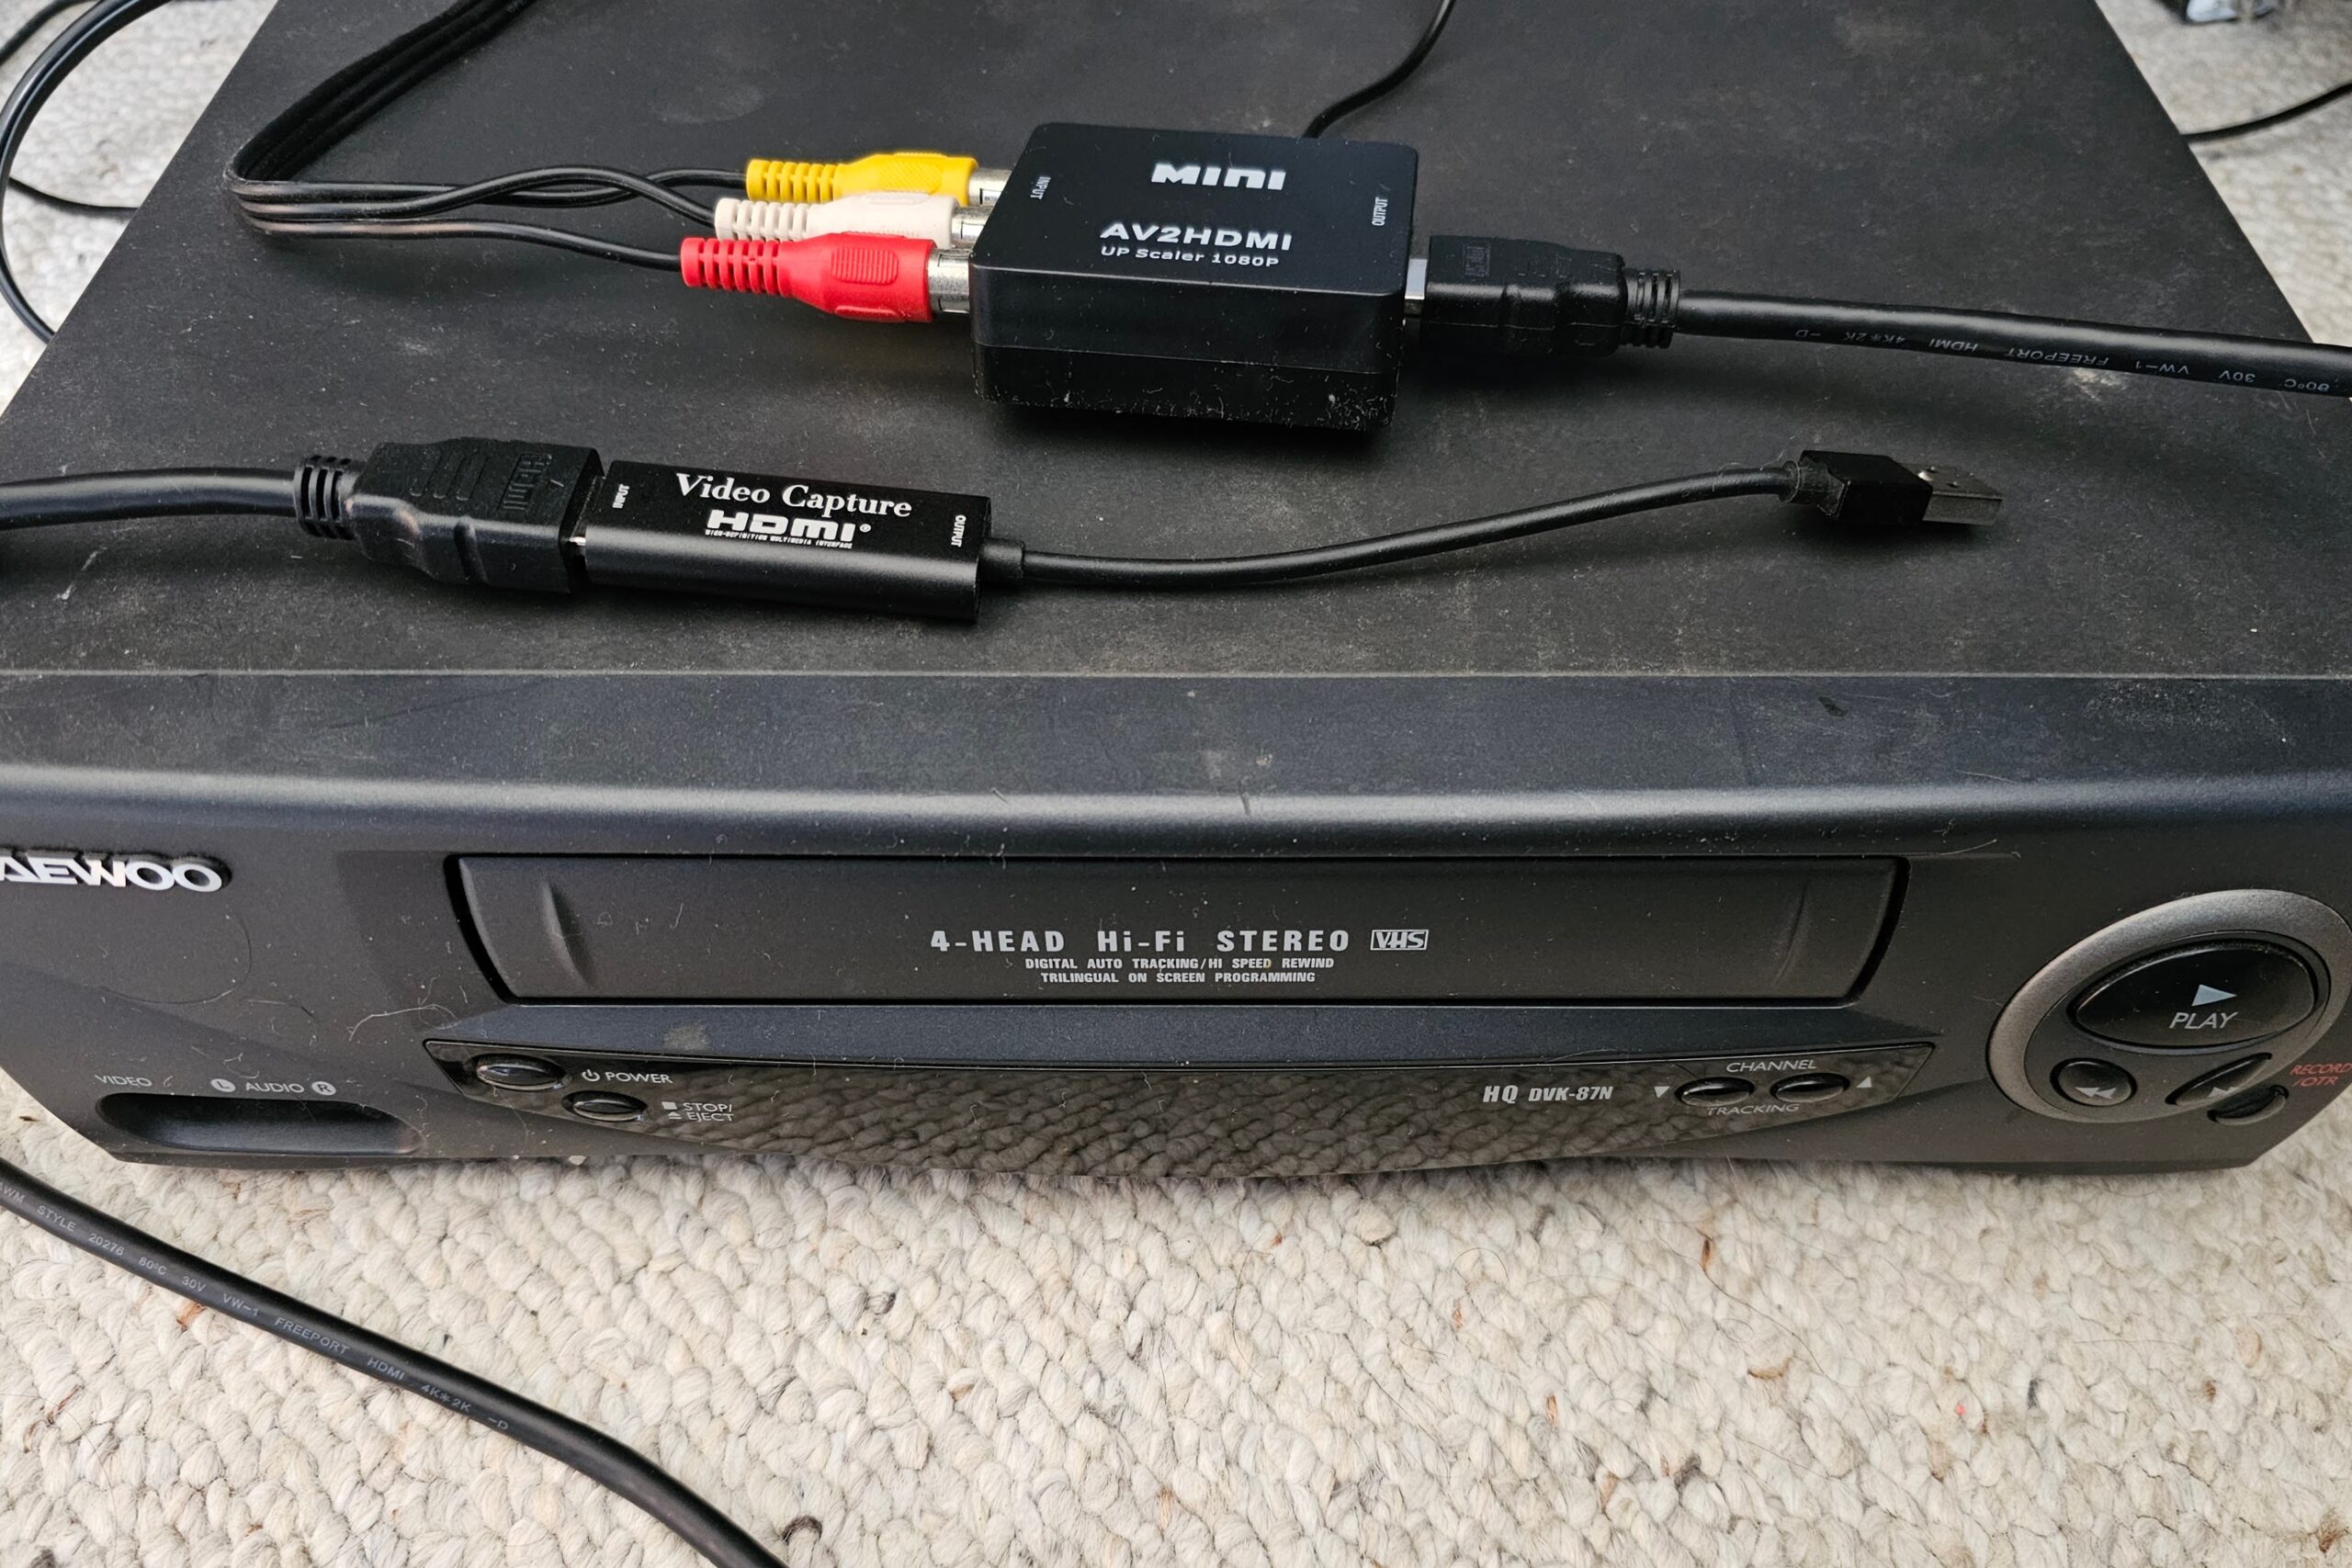
- A USB Capture Card: This is the heart of the operation. A USB capture card is a small device that connects to your computer’s USB port and allows you to record video from an external source, such as a VCR. You can find these on Amazon for a relatively low cost, often under $20. Look for one that supports 1080p at 30 frames per second or 720p at 60 frames per second. Many come with a USB-C connector and a USB-A adapter for compatibility with different computers.
- A VCR (VHS Player): This might seem obvious, but you’ll need a VCR to play your VHS tapes. If you don’t have one lying around, check thrift stores like Goodwill, browse Facebook Marketplace, or search on eBay.
- A Composite-to-HDMI Adapter: Most VCRs don’t have HDMI output, so you’ll need an adapter to convert the VCR’s composite video output to HDMI. These are also readily available on Amazon for around $10.
The Setup: Connecting the Pieces
Once you have all the necessary hardware, connecting everything is relatively straightforward:
- Connect the composite video output of your VCR to the composite input of the composite-to-HDMI adapter.
- Connect the HDMI output of the adapter to the HDMI input of the USB capture card.
- Connect the USB capture card to your computer’s USB port.
Your setup should look something like this:
VHS Player → Composite video out → Composite adapter → HDMI out → USB Capture Card → PC.
This setup should work with Windows, Mac, Linux, or even a Chromebook capable of running Linux apps.
The Software: Open Broadcaster Software (OBS)
The other crucial piece of the puzzle is software. Open Broadcaster Software Studio, or OBS, is a free and open-source program primarily used for streaming video game footage on platforms like Twitch and YouTube. However, it can also be used to record video from any HDMI video source, making it perfect for digitizing VHS tapes.
Recording Your VHS Tapes with OBS
Here’s a step-by-step guide to recording your VHS tapes using OBS:
-
Install OBS: Download and install OBS from the official website.
-
Configure OBS:
- Launch OBS.
- In the "Sources" panel, click the "+" button and select "Video Capture Device."
- Give the source a name (e.g., "VHS Capture") and click "OK."
- In the "Device" dropdown, select your USB capture card.
- Adjust the resolution and frame rate settings as needed (1080p 30fps or 720p 60fps is a good starting point).
- Click "OK."
-
Adjust the preview: OBS should now display your VCR’s video feed in the preview window, likely in a small corner. To fix this, drag the corner of the video source in the main window, so it fills the entire screen. Make sure to move the video source to the center of the preview window.
-
Start Recording:
- Hit play on your VHS player.
- In OBS, click the "Start Recording" button.
-
Stop Recording:
- Wait until the video has finished playing.
- In OBS, click the "Stop Recording" button.
OBS will save the recorded video file in the MKV format by default, typically in your computer’s videos folder.
Editing and Refining Your Digital Video
Once you’ve recorded your VHS tape, you can use video editing software to trim unwanted sections, improve the video quality, or add titles and transitions. There are many free and paid video editing programs available.
You can then convert the MKV file to a more common format like MP4 for easier sharing and playback. You can use tools like Handbrake for video conversion.
Burning to DVD
If you want to create a physical copy of your digitized VHS tape, you can burn it to DVD using a program like DVD Styler.
Alternative Solutions
While using a USB capture card and OBS is a cost-effective and versatile solution, there are other options available for digitizing VHS tapes:
- Dedicated VHS to DVD Converters: Products like Vidbox or Roxio VHS to DVD are specifically designed for this purpose and offer a more streamlined user experience.
- Professional Digitization Services: If you have a large collection of VHS tapes or don’t want to deal with the technical aspects of digitization, you can hire a professional service to convert your tapes for you.
The Advantages of a DIY Approach
While dedicated converters and professional services have their advantages, the DIY approach using a USB capture card and OBS offers several benefits:
- Cost-Effectiveness: Buying the necessary adapters is significantly cheaper than purchasing a dedicated VHS to DVD converter or paying for professional services, especially if you already own a VCR.
- Versatility: OBS can be used for a wide range of video recording tasks beyond digitizing VHS tapes, such as recording gameplay, capturing streaming video, or creating presentations.
- Flexibility: You have more control over the digitization process, including the video quality, file format, and editing options.
Beyond VHS: The Endless Possibilities of OBS
Once you’ve mastered the basics of OBS, you’ll discover its many other uses. You can use it to:
- Record streaming video from services like Netflix and Hulu.
- Capture gameplay from video game consoles.
- Create online tutorials and presentations.
- Record video calls and meetings.
- Stream live video to platforms like Twitch and YouTube.
OBS’s "Scenes" menu allows you to create different setups for various recording tasks, each with its own layout and capture devices. This makes it easy to switch between different recording scenarios without having to reconfigure everything from scratch each time.
OBS can take some time to learn, but with a little practice, you’ll be amazed at its potential. It’s a powerful tool that can unlock a world of video recording and streaming possibilities.